3 Commands: Getting There! (#2)
In this article, you’ll be learning another three WHOLE commands! If you haven’t read ‘3 Commands: The Basics’, I highly recommend you do so first.
Anyways, let’s get into it. This is only the 2nd article from ‘3 Commands’, so there’ll still be another one. Now, let’s go!
Command One
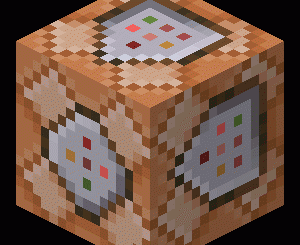
This’ll be a simple one. It’s a basic setblock command. Basically, the command makes a block that is powered by command blocks. It’s good for some custom Skyblock you make yourself, which can turn out to be quite fun (I made one xD). When the block breaks, it creates itself again and again. It’s also an infinite block, long story short. You’ll understand if you get to try it yourself. For exmaple, I’ll use an iron block. Replace ‘iron_block’ with anything you want. They’ll give guesses, depending on what you type. Like, diamond ore will be ‘diamond-ore’ or iron ore will be ‘iron_ore’. Follow the instructions, and the letters in Bold (the thick letters like this: TEST) are the commands.
Instructions:
- Open a command block.
- Write in the command:
/setblock iron_ore 0 4 0
Oh yeah. The ‘0 4 0’ at the end are the coordinates for where you want the blocks to be placed. In Minecraft Java Edition, you can just hold down F3, but for Macs and some laptops, Fn + F3. However, you can use Alt + Fn + F3 on newer Macs. But compared to Minecraft Bedrock Edition, it’s a simple matter of pressing the button beside the chat one (the unpause signal), then clicking on the ‘Settings’ button, and scrolling down until you see the words ‘Show Coordinates’. Switched on means that the square is on the right, and off means that the square is on the left. Click on the square to change it. Then, press back, press ‘Resume Game’, and on the top left, there’ll be some numbers sticking out. Those are the coordinates. The first number(s) are called ‘(x)’, the middle number(s) is ‘(y)’ and the last number(s) are called ‘(z)’. The most important is probably the second one, because they tell you where your height level is.
Command Two
This command is the ‘tp’ one. No, not ‘tp’ as in ‘toilet paper’ but ‘tp’ as in teleport. So here we go… And yes, last command’s format please. Not forgetting, fill in the blanks with the username. The first blank is for the person teleporting, and the second blank is who the person is teleporting to.
Instructions:
- Open chat.
- Type in the following command:
/tp “_______________” “_________________”
Take not that this command can’t take usernames with finger spaces! Now, this tp command is for teleporting to specific coordinates. Here:
Instructions:
- Open chat.
- Write this command:
/tp @s (x?) (y?) (z?)
Replace ‘(x?)’, (y?)’ and ‘(z?)’ with their x, y and z coordinates!
Command Three
This command is known as the locate command. It helps locate structures for you. This comes in quite useful if you need some stuff (survival mode) or want to explore more (creative mode)! Keep in mind that the Witch Hut falls under the ‘temple’ structure, for some reason. If you’re in a desert biome, it’ll locate a desert temple (most probably). If you’re in a jungle biome, it’ll locate a jungle temple (most probably). If you’re in a swamp biome, it’ll maybe locate a witch hut. For this example, I’ll use a village.
Instructions:
- Open chat.
- Type in this command below:
/locate village
The tp command comes in useful. After they give you the coordinates, use the tp command you just learnt! Oh, and for the (y) coordinates, I suggest you do 100, because you probably won’t end up in a mountain or underground. Do 60 to take a risk!
Anyways, I hope you liked this, so,


